Blog
Amazon DMS, or Database Migration Service, is a service that makes it easy to migrate existing databases from outside of AWS into the cloud with minimal or no downtime. With just a few minutes of setup, DMS takes care of all the hard work of exporting the data from the old database and importing it into the new database. Once the initial import is complete, DMS is even able to monitor for changes in the original database and apply them to the new database.
DMS supports many different database options, including MySQL, PostgreSQL, Amazon Aurora, Oracle, SQL Server, and SAP ASE. In most cases the original and new database don’t have to match, making it easier to transition from one type of database to another.
The Quick and Dirty
Putting it simply, the process to use DMS can be broken down into three easy steps.
- Setup a DMS replication instance
- Create a source and target endpoint
- Configure a task and start it
What does all that involve you ask? Well, let’s break it down further by running an example migration. In this migration, we’ll be moving a MySQL database of about 13 GB from a data center in Los Angeles to a new and empty RDS instance in the cloud.
The Replication Instance
The first step you need to perform when using DMS is to create the Replication instance. This is the instance that will connect to both databases and carry out the migration. Setting up the replication is quick, and doesn’t require a lot of information, just what’s shown below.
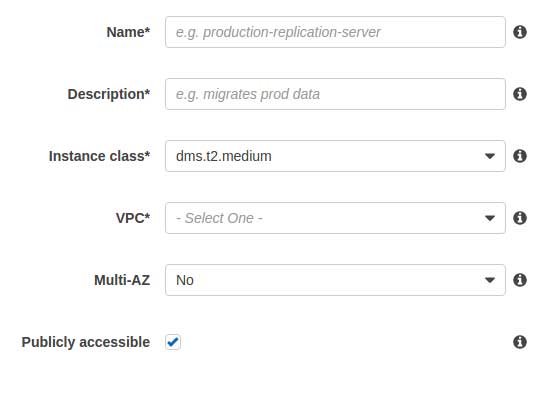
Not shown above, but for those who need them, there is an advanced options section, which allows you to configure things such as allocated storage, security groups, the availability zone, as well as the KMS master key used to encrypt the data while it’s at rest on the replication instance.
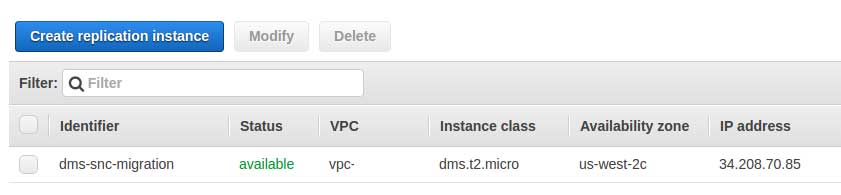
Pictured above, our replication instance is ready to accept tasks we’ll provide it in the following steps.
Configuring the endpoints
The next step will be configuring the endpoints. An endpoint is simply a configuration that DMS uses to connect to the database server so it can properly import or export data. As shown below, setting up an endpoint is just entering the information on how DMS will connect to the server.
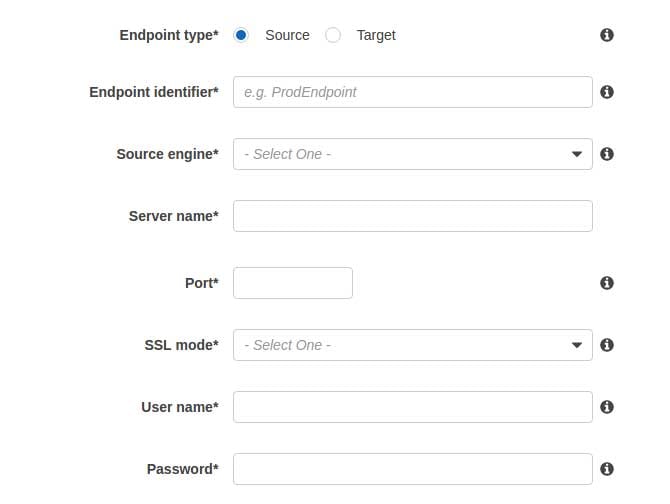
You’ll need to setup at least one source endpoint and one target endpoint; however, it is entirely possible to have more than one of each. You can easily combine four different databases across two different servers into one RDS instance just as easily as you can move a single database.
Some options will vary depending on the type of database, such as the SSL mode to use. While none is always an option, the other options will vary. Some engines will also require more information, SQL Server, for example, requires a database name to be provided.
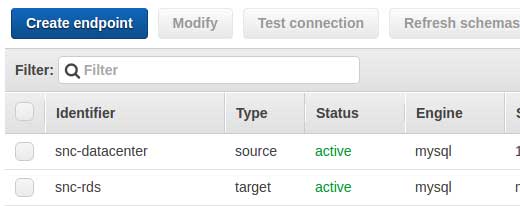
Pictured above you can see we have two endpoints setup, one pointing towards the data center, where the source database is stored at, and another pointing towards a newly spun up RDS instance. Before we move on to the next step, though, there are a few other things we can do while we’re here, testing the endpoint connection and refreshing the schema.
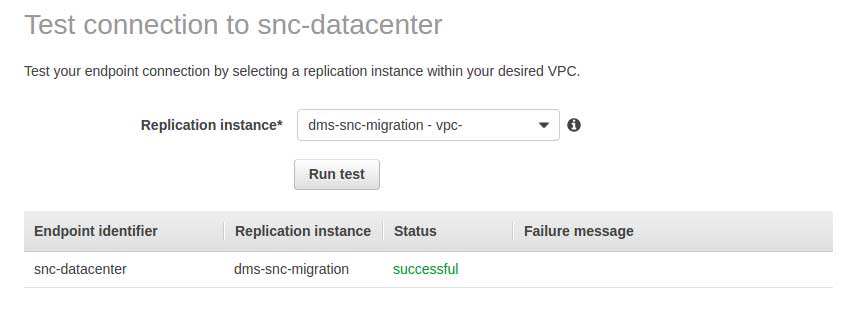
Testing the connection can be done while initially configuring the endpoint, or at any time by pressing the “Test connection” button at the top of the endpoint page. Either case will bring up the same basic display which will allow you to test the connection and display if it was successful, or if not, provide a failure message so you can identify what went wrong.
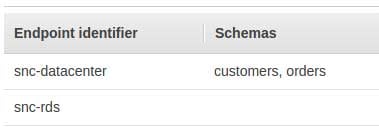
Refreshing the schemas can be performed manually, but if it is not then, it will be done automatically when DMS starts working on a task. While it is not required, it can help confirm that you can properly see the schemas correctly. As shown above, we can see there are two schemas in one database, and none in the other.
Configuring a migration task
The last thing we need to do before our replication instance can begin its job is to configure the task. The task tells the replication instance what data it should move and where it should move it to. As pictured below, we need to give it a source endpoint and target endpoint and tell it how it to migrate the data.

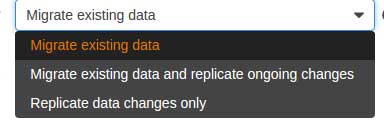
While the above might seem simple enough, we still need to tell DMS what data needs to be migrated over. We do this via Table mappings, either in a guided fashion or by feeding it some JSON.
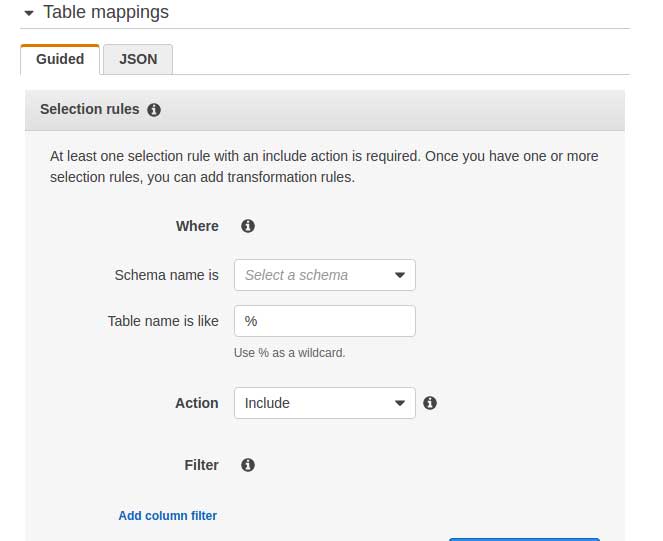
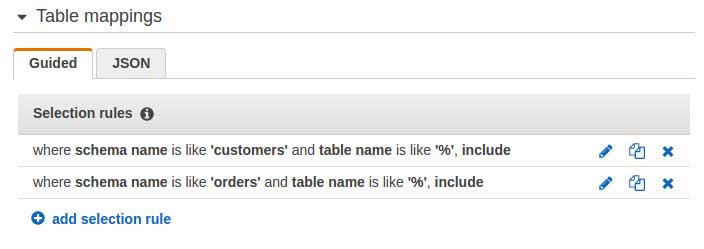
Table mappings can be as broadly or narrowly defined as you want. You can pick one or two schemas and include only those, or you can include all schemas and then pick three that you don’t wish to migrate. In our case, we add two table mappings, one for each of the two schemas we are going to move over.
At this point, we can create our task and let it begin moving the data over. However, there is one more thing we can do with each task, and that is transforming the data via a transformation rule.
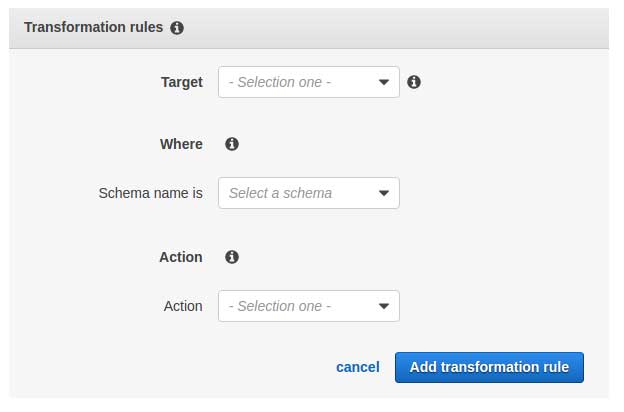
Transformation rules can be applied to schemas, tables, or even columns and allow you to do things such as convert a column name to all lowercase or add prefixes to each table name. This can be especially useful when switching between different database options as some engines treat case different than others. In our case, we’ll create rules to prepend “snc_” before each table name.

With that, we create our task and let it begin running
DMS does the heavy lifting

At this point, you just have to kick back and relax. Browse reddit, chat with coworkers, take a walk, it doesn’t matter, DMS will be migrating your databases over in the background. How long this takes will vary depending on a number of factors, such as the size of your database, the instance class of the migration instance, and even the speed of the connection at the source. For our example, it takes about 20 minutes for everything to be migrated over.

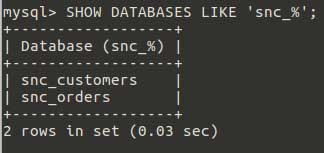
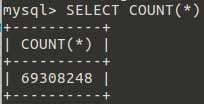
As shown, the initial data load has finished, and although it’s cut off in the image above, DMS is now performing ongoing replication and will replicate any further changes over to the new database. If we login to the RDS using standard command line tools, we find our two schemas have been moved over (and renamed), and counting the number of rows returns the count that we expect.
With everything migrated, we can now switch over to using our new database in the cloud and terminate the DMS instance we spun up.
Closing
Amazon’s DMS is a great tool which makes it easier to migrate databases, especially large ones, from an existing server into the cloud. Of course, there are some gotchas with using DMS, but most of these are well documented and easy enough to correct.
FAQ
-
What are the limitations or constraints of using Amazon DMS, especially concerning database size or complexity?
- Amazon DMS is designed to handle a wide range of database sizes and complexities, but there may be limitations related to very large databases or highly complex schemas that could require additional manual handling or customization
-
How does Amazon DMS ensure data integrity during the migration process, particularly for large datasets or databases with frequent updates?
Amazon DMS ensures data integrity during migration through data validation, continuous data replication, and comparison between source and target databases, minimizing the risk of data loss or corruption.
-
What kind of post-migration support does Amazon DMS offer to ensure the migrated databases function correctly in their new environment?
- After migration, Amazon DMS provides monitoring tools and logs to help users verify the integrity and performance of the migrated databases and ensure they operate correctly in their new environment.
Go Back


Share this post